Miscellaneous hull and deck.
Rule: Fill All Holes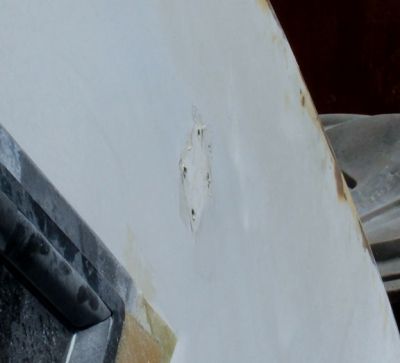
|
Rules! One rule that should be made is to fill ALL holes. Temporarily, I had left the outrigger holes so installation would be easier. While working on the the bridge fairing I noticed the rigger holes and I began thinking of all the work I was doing to make the "right look" and "what would happen if" scenarios. For example, after the boat has been painted and the top installed, what would I do if the riggers would look or function better if moved 1". leaving the existing holes would not permit me to make it right.
FILL ALL HOLES. A drill makes new holes easy! |
| Adding to the existing rub rail for the addition. |
Adding Rub Rail
|
Black Rub Rail
|
What a dramatic difference is made with the black rub rail extended. Originally we had wanted to replace all rails with white. We are now happy that we did not. We find the added definition of the hull very attractive. |
| One problem with PVC rub rail is when expansion and contraction leads to joints leaking. The leaking creates streaks down the hull. We drilled small holes that should help the compound stay in place. |
Rub Rail Seam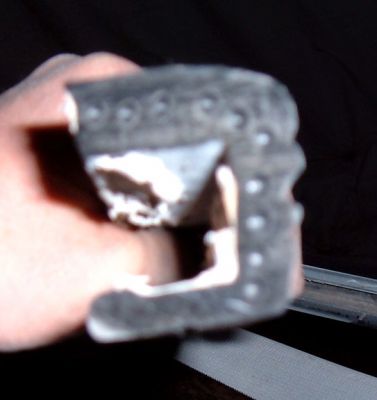
|
Bonding
|
Here, we are making the bonding wires that will tie the current bonded system into the moved trim tabs, along with new Imtra underwater lights and the zincs that will be located in the cylinder area. Wires are cut to length, ends are crimped, and heat sealed. |
| October 8, 2009 This outlet on the starboard side of transom and one like on the port side are the drains for everything on board including the bilge pumps, showers sump and galley sink. Also included is the cooling water for the air conditioners, KRA and Eskimo. Lots of water flows out of these and the problem is, they are almost 5" above water level which makes them splash water onto the transom and makes the ugly streak as seen here. |
Ugly Streak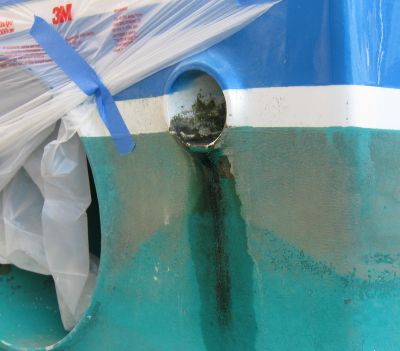
|
Drain Outlet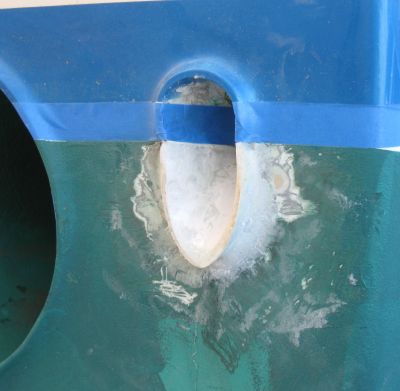
|
The solution to minimize the problem was to elongate the outlet toward the water in a sloping manner and . . . |
| .... to have it protrude in such a way that water flows off rather than trails down. A part was made by cutting a PVC Y. The old was cut just below the white boot stripe using a Fien tool then cuts were made at a 45 degree up to the first cut. Once that portion of the old was removed, epoxy paste was put in the hole and the new part was sqeezed in. Excess epoxy was removed prior to drying and faired once dry. Inside, glass strips soaked in epoxy resin were wrapped around the new part making it one with the old. |
New Drain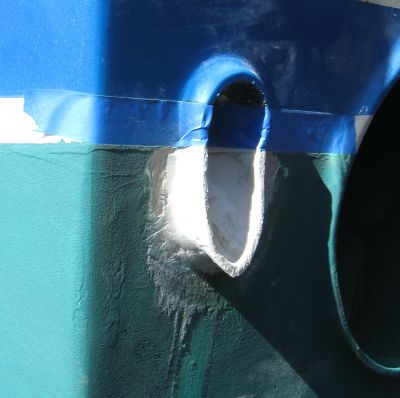
|
|