Teak Boards are Gold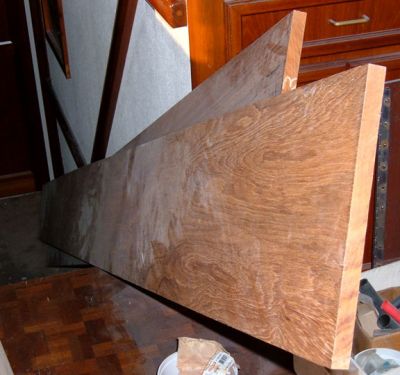
|
This is part of the teak for the covering boards. The current price of teak is quite stunning! We will have approximately 6" of teak on the inside edge of the gunnel instead of just coaming pads and covering boards. This teak will be kept oiled. Some people varnish or put a finish on teak that defies its intended purpose. Teak is naturally non-skid. We do not want anyone to slip getting on or off our boat. |
| Here, we are cutting the board that will be both the port and starboard inside gunnel. This is like cutting gold so we are being very careful! |
Cutting Gold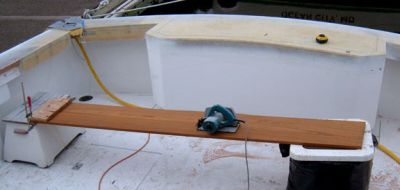
|
Fitting Teak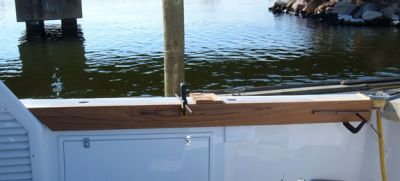
|
The teak is clamped in place after several fittings. Next, we drill for the screw locations and then take down the board. Once separated, the drilled holes are used as a guide and the holes are re-drilled with a countersink bit. |
| Port side fitted and drilled. |
Fitted and Drilled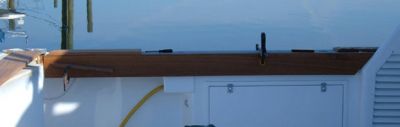
|
Gunnel Boards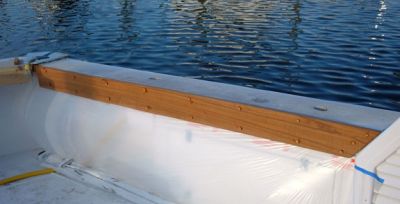
|
The port and starboard gunnel boards are epoxied and screwed in place. The screw holes have been covered with plugs made from scrap teak and epoxied in place too. |
| The pattern is taped to the teak for the starboard gunnel and marks are made for the first cut. |
Pattern Marked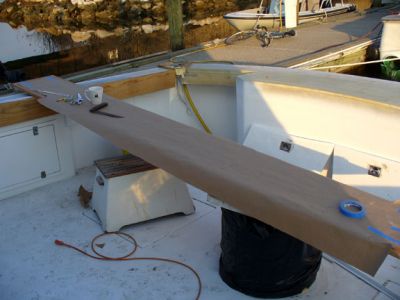
|
First Cut
|
The first cut is made and more fittings follow. |
| The teak is clamped in place and marks are made to fine tune. |
Fitting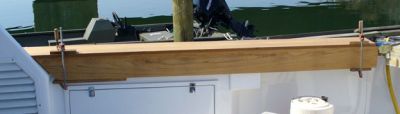
|
Plugged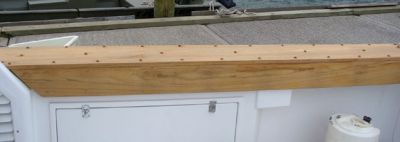
|
The board and plugs are glued and screwed into place. |
| The plugs and excess are sanded down and the edge routed. |
Sanded and Routed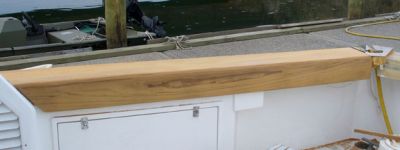
|
Gunnel Boards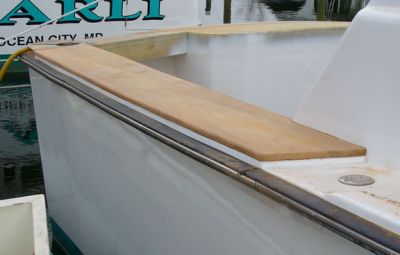
|
The teak is now flush with the hawse pipe. This is just another angle. Note that the forward edge is high enough to stop water from flowing into the cockpit. |
| The teak is making her look good. Can't wait to get the aft and fishbox teak installed. |
Starboard Side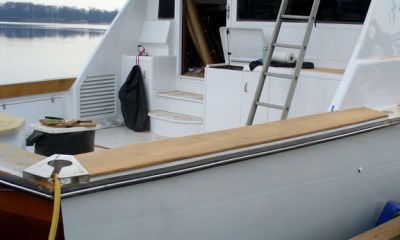
|
Teak Topper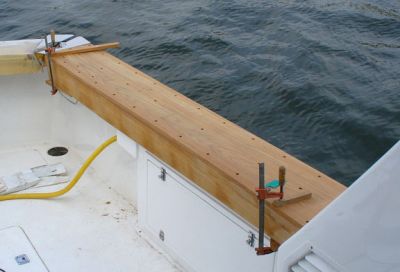
|
Port side teak gunnel board glued, screwed, and plugged. |
| Plugs sanded down. The top protruding edge was sanded flush with the side board and then edges were routed. |
Port Side Air Handler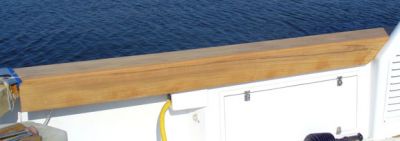
|
Fitting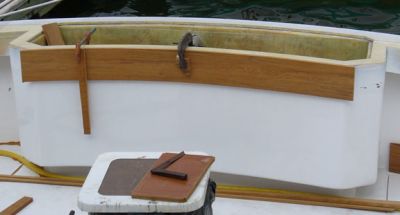
|
Fitting teak on the fishbox. Clamp, scribe, cut, and repeat. |
| The teak is glued, screwed and clamped in place. We used a lot of screws because of the curve. It took a lot of pressure to hold this curved teak coaming in place. |
Glued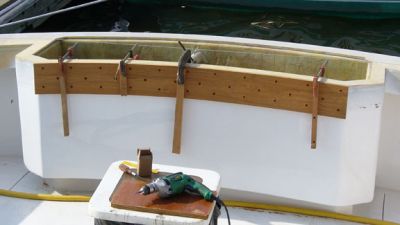
|
Plugged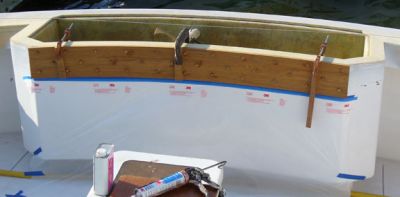
|
Plugged and waiting for glue to set. With the pressure on this board, to be sure, we'll wait for a few days before taking clamps off. |
| Fitting this outside corner is a pain! Fit, cut, sand, cut, fit. |
Outside Corner of Fishbox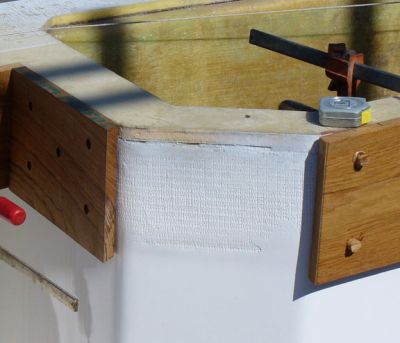
|
In and Plugged
|
Got'em in! Now they are in and plugged. After the teak has been dried overnight I can sand and shape. |
| Time taken pays off! Can't wait to install the top. Note that there are no sharp corners. Also note that when you lean on these they are flat against you. Careful attention was paid in planning gunnels and the fishbox for this to work. They are comfortable and will assist when we are stand-up-fighting the big one. |
Pay Off
|
Teak Front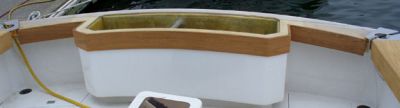
|
Front on, plugs sanded, and edges rounded. |
| This gives an overview of teak currently completed as of April 3, 2007. |
Overview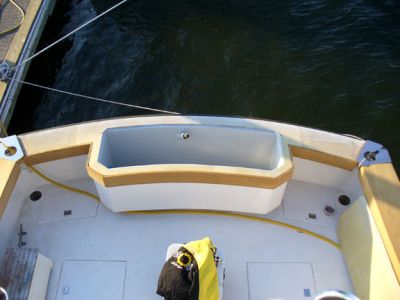
|
Fitting the Top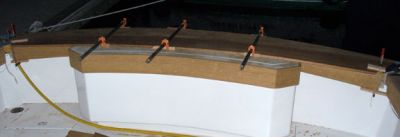
|
It will take three pieces of teak to insure the needed width for the gunnel and box top. Pictured are the first two fitted. To accomplish this, the first board was clamped in place and 1/8" pilot holes drilled. These holes insure proper placement and will be used for screws. Once the first boad was fitted and a few screws were installed, the second was fitted and clamped next to it. Again, pilot holes were drilled. |
| During each step, measurements were taken and the box lid transcribed to the top of the teak. This provided us the map so pilot holes would have proper placement. The map also included the division of the lid into three PC's. The bottom side of the boards that will make the box lid were scored every 2" with the skill saw. The cuts were about 1/2" deep and were made so the teak would take the camber and not flatten the lid. Note that no glue has been used at this point. |
Fit Clamp . . . .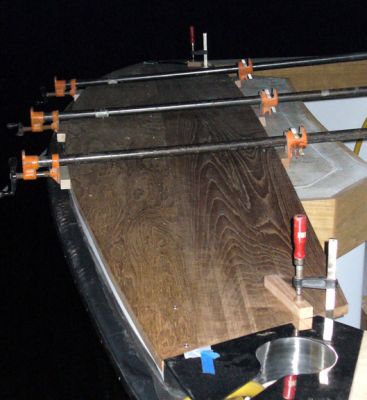
|
Fit and Clamp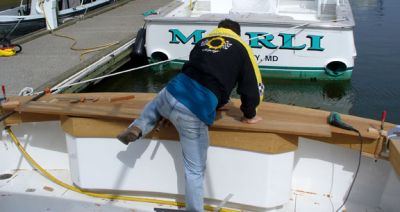
|
Here, I'm fitting the third board. Once fitted, all three will be taken off. Then, Tyvek tape will be placed where the seams will lay. The first boad will be set and a bead of epoxy glue will be laid on the edge before board two is set. Board two will get the same treatment before board three is set. Once all three are in place with glue in seams, they will be clamped together as one. |
| Here, the seams are glued and clamped. This has been allowed to sit for several days while the glue fully cures. The outline of the box and gunnel have been drawn on the underside of the teak. Several more screws will be placed in the lid portion of the teak before the full piece, now one, is removed. Once removed, it will be flipped over and the lid can be scribbed onto the teak and cut along the outline. Several other cuts will also be made that will allow the box to be framed without the end grain showing. All pilot holes will be redrilled with countersink bit and parts will be reinstalled using glue and screws. |
Time To Dry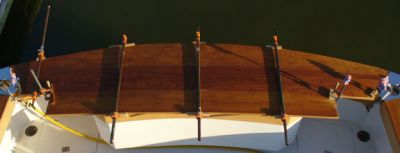
|
Teak Lid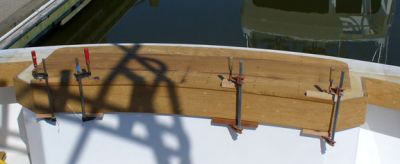
|
The teak fishbox lid has been cut and glued/screwed. |
| After the lid was cut out we made an additional cut, meant to eliminate the exposure of the end grain. |
Eliminating End Grain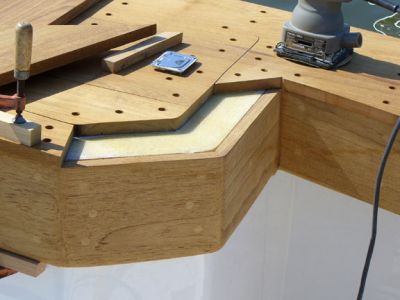
|
Fitting Long Grain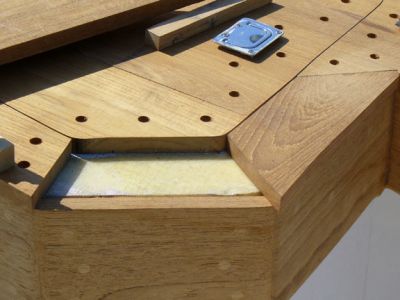
|
Two PC's will now be cut to fill the void with only the edge grain exposed. Here, the first PC is being fitted. |
| Void filled! The same will be done to the starboard side of the box. |
Filling the Void
|
Making Plugs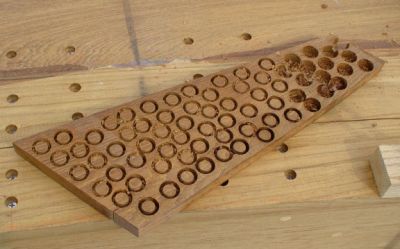
|
Plugs are made from "scrap" teak. More than 80 are needed for this aft portion. We try our best to match the color of the plug to the board we are filling. |
| Here, the plugs have been sanded off and a cut made on the lid for the number one hinge. Hopefully, Rusty (the Camden Kid) will approve my work. Rusty is a mastercraftsman and has advised and helped in many ways. Rusty is going to recess the lid handles but I really need his help to save the inside corners at the Hawse pipes. I now think that I should have done the teak on the corner first. But that is not what I did! Rusty can save me. |
Coming Together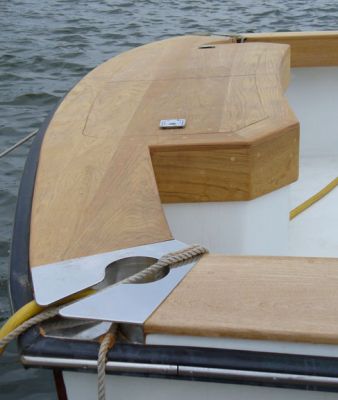
|
One More!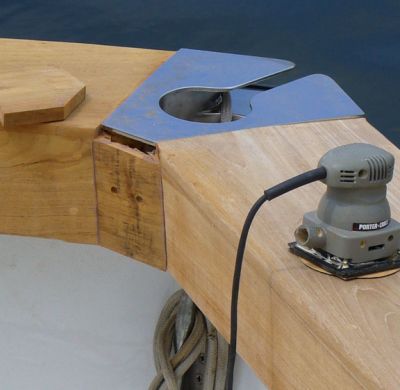
|
One more piece to fit! I did the best I could with these corners. The port side had been competed a little differently then the starboard side, but I will have to live with it. |
| Both hinges have been installed in the fishbox and the teak has been sanded to 220. The teak was then oiled with Starbrite Teak Oil. |
Installed Hinges
|
Comfort Zone
|
Another view of the oiled teak. You can lean on any portion of the gunnel in comfort. This was a very important aspect to us and the reason we paid attention to angles. |
| A view from the bridge. We will put more oil on the teak as soon as we can. |
Bridge View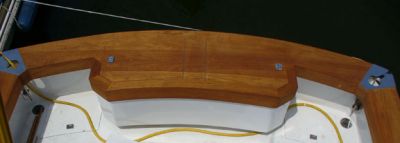
|